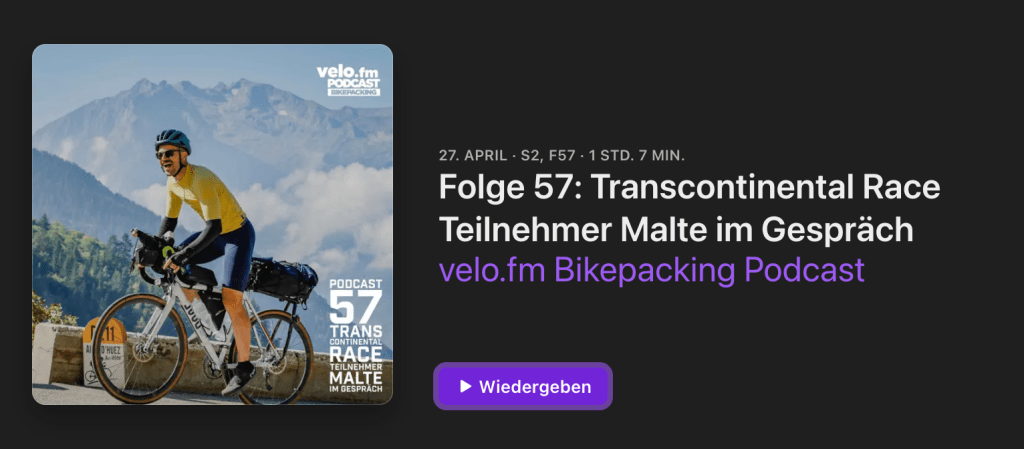
Ende März traf ich auf der Cyclingworld Messe in Düsseldorf – am Tailfin Stand – auf Sebastian und Christoph. Ein vorsichtiges Buzzword- und Name-Dropping (so läuft es halt auf Messen haha) führte zu einer Podcast-Einladung zum Bikepacking-Format von Velo.fm
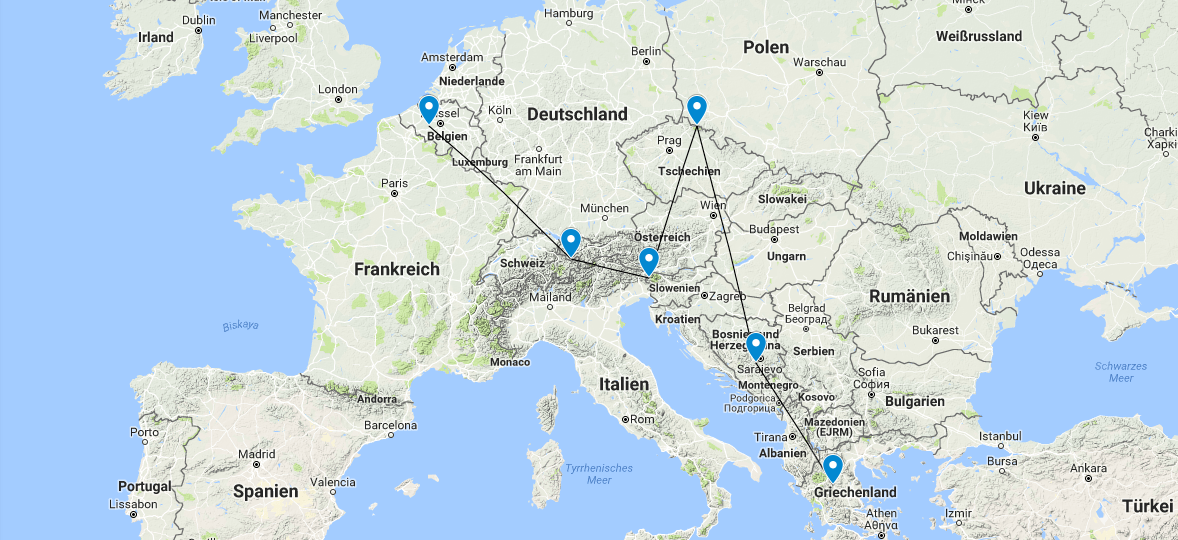
Die Aufnahme des Podcasts folgte prompt. Es ging im Allgemeinen um die berüchtigte “Mutter aller Self-Supported Ultra-Cycling-Rennen”, das Transcontinental Race, an dem ich bisher zwei Mal teilnahm – und finishte – und das ich auch dieses Jahr wieder fahren werden. (Über das Menü findet ihr zahlreiche Inhalte von mir zu meinen Teilnahmen bei dem Rennen)
Es ging erstaunlich wenig um technische Elemente (Equipment, sportliche Vorbereitung, Ernährung) und erfreulich viel um die softeren Faktoren: Was motiviert einen/mich bei so einem Rennen? Wie ist die mentale Vorbereitung? Mit welchen Leiden und Freuden ist so ein Rennen verbunden? Warum mache ich es wieder?
Hört hier rein! Ich hoffe es gefällt euch. Freue mich natürlich auch über Rückmeldungen wenn/warum es euch gefallen hat, oder warum nicht.
Danke an Sebastian und Christoph für die Einladung! Es war mir eine Freude.
Firstly: the map only really works on Desktop; to benefit from all the features I built in and for comfortable usability, you need a proper screen and mouse/touchpad (i.e.: mostly useless on your smartphone).
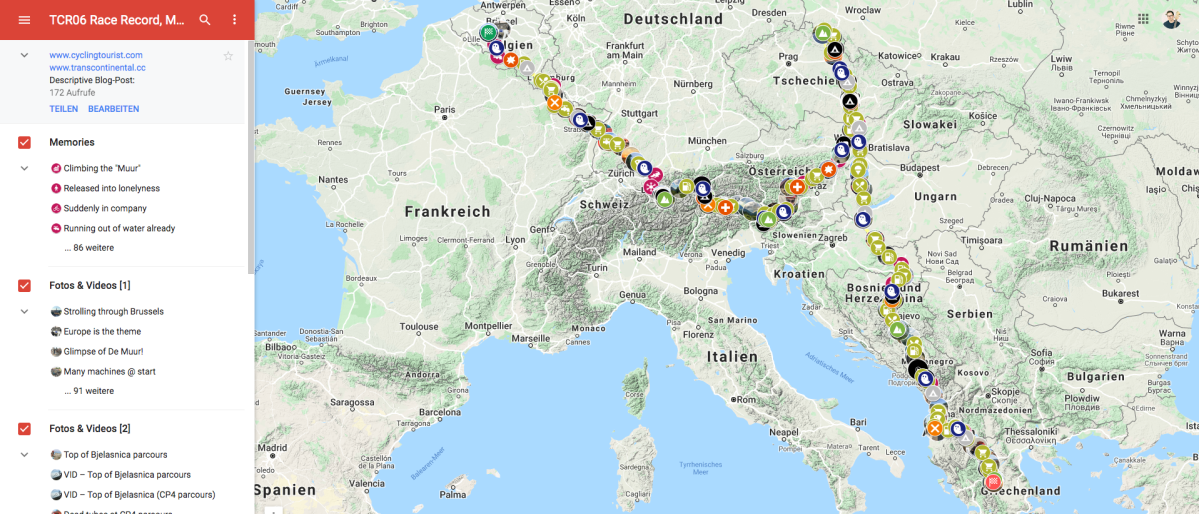
The interactive map lets you dive into alllll the details of my Transcontinental Race in 2018 (edition 06). Additionally it’s of course possible to copy-paste GPS coordinates of specific spots/pictures/momories/etc. from my map into GoogleMaps to check them on Streetview. In case you’d really want to go all the way (which I doubt) you could even use multiple browser tabs simultaneously, e.g.: Timeline, MyMap-Racemap, GoogleMaps.
Layers of the map (switch on/off)
The geo-points are divided into layers that can be displayed or hidden on the left. You can click on each item in one layer to get to the respective point. Check the map-legend below. There’s occasionally a bit of text to read behind each point:
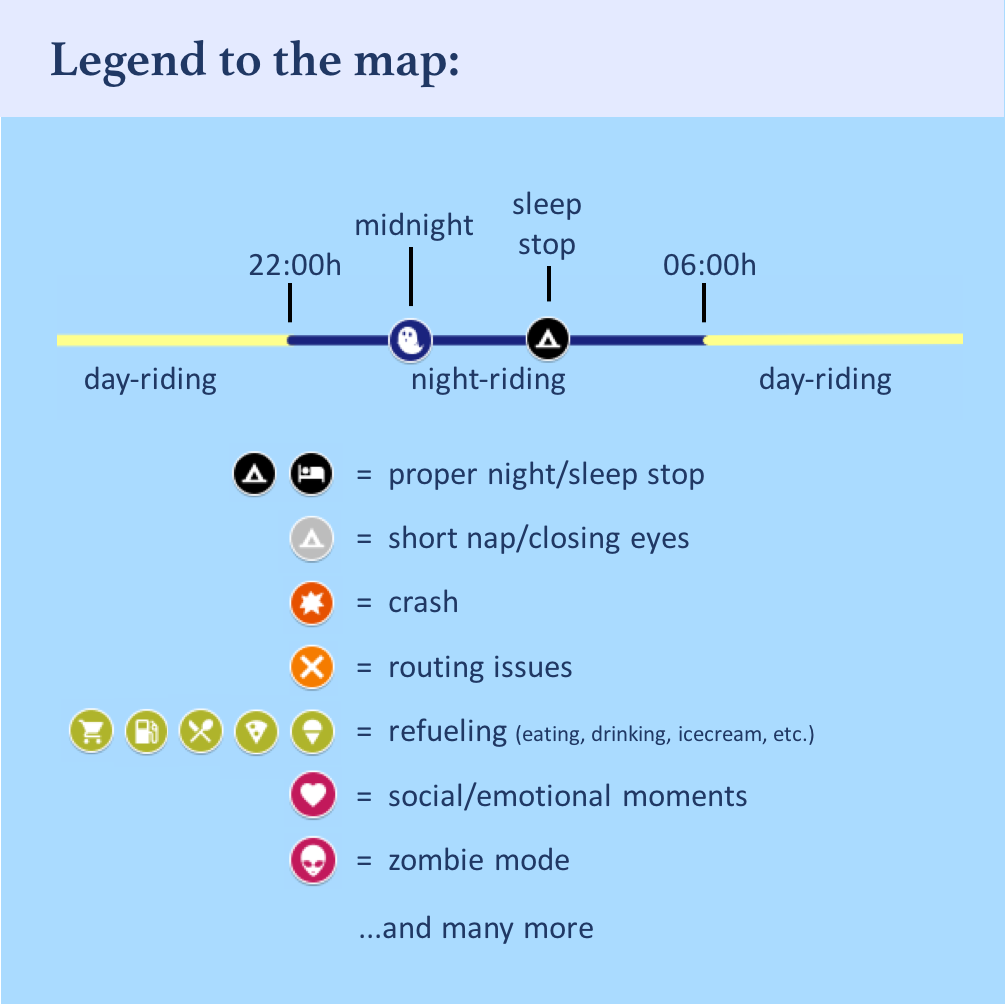
GPS-track: In order to show where I cycled in daylight and at night, the track is coloured yellow from 06:00-22:00h (day) and dark blue from 22:00-06:00h. It very roughly matches sunrise and sunset.
Midnights & Mountains: In order to really see what section I rode on what calendar day, I created markers for all the spots I passed at exactly midnight, and also numbered them by the race day that would begin with it. As landmarks I also included mountains. However because they obscure some of the day/night-colour coding, I put those into a separate layer to allow you and me to switch them off, too. So you can switch off everything except for the route to get the most basic overview.
Sleep: Here you find in black all the spots where I had what I’d call a proper night rest, i.e. where I pulled out my sleeping mat to try to really sleep, or where I booked a bed somewhere (which happened twice). In light grey you find those spots where I closed my eyes for a bit. Sometimes some of that was sleep, but mostly it was just lying down on my back and relaxing. So next to going from midnight to midnight to see calendar days, you can alternatively go from black tent to black tent to see the beginnings and ends of separate stints (“stint” defined as the part of the way between two proper night rests).
Memories: These are random memories. They may address anything: detailed stories about my mood & things I experienced, struggles I had, people I met, etc. If you’re going for the story-telling part, this is where to look. Usually they also contain a text description of the situation.
2 Photo-Layers: They are sorted chronologically in the list. (There is no functional, just a technical reason for having two layers)
Refueling: Those are all stops that I identified as stops where I bought food or drinks. These are by far not complete: There must have been many more. But the displayed amount already gives you an impression how central eating is to the race.
Adversities: These include multiple crashes, their stories, reasons and impact. Furthermore routing problems and health issues.
Method: Reconstructing memories after 1,5 years?
First of all: Yes, it was all long ago, but it also was such an intense and memorable experience that many moments, places, etc. are still burnt into my memory. Still: I got myself some help in the form of bits and bytes: downloaded and organized my GPX-files, i.e. the GPS-tracks that I recorded with my Wahoo Elemnt GPS unit. It plotted one GPS point per second of riding. Additionally, I had set it to auto-pause during TCR, so anytime I did not move for longer than 5 seconds, there is a gap in the record.
I followed essentially these 6 steps:
Downloading the GPX files
cutting up and converting the files in several ways (e.g. by calendar day and stage)
creating excel functions to better find the gaps in the record and thereby tracing every single time I stopped
check the respective GPS coordinates of each break longer than 30 seconds on GoogleMaps incl. StreetView and thereby remember what exactly was going on.
Create a note in my interactive map, choose an icon, picture and some text
Sort all points chronologically in the layer-list, per layer
Yes, it was a lot of work. In the process of that I also began to recall many more moments and memories in the context of those breaks so that in the end I had a VERY detailed account of all the stuff that happened to me during those 14,5 days. Of course that way I also figured out how long I rode each day in terms of time and km/elevation, and how long and where I stopped to get some night rest (when I did); i.e. the beginnings and ends of the separate stages
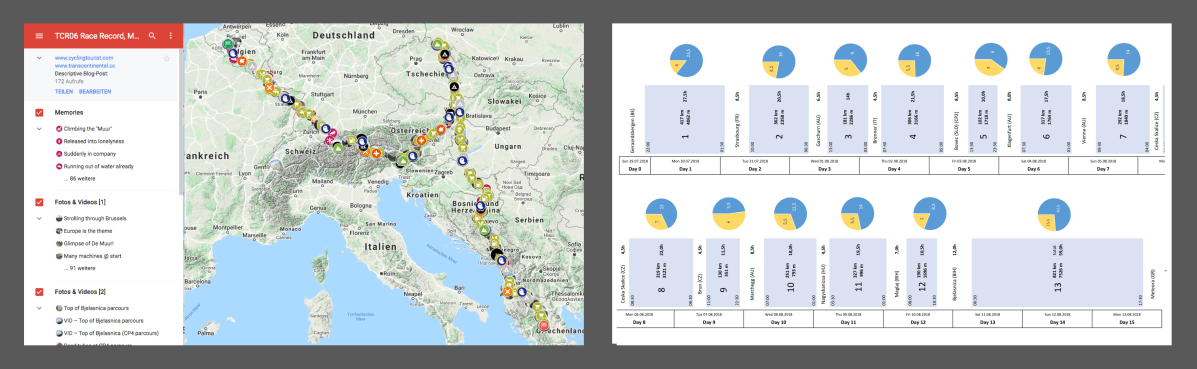
Below you can scroll through a timeline of my race: it matches my stages in relation with the 24h-calendar-days. It provides information about:
When each stage started and stopped
Where each stop was and for how long I was stationary (does not mean I slept that long. Usually just a fraction of it due to faffing around).
How long each stage was in terms of time, distance and climbing
Where I rode into or through the night
The ratio of moving time vs. stopped time during a stage which indicates the efficiency of that stage. I realized the numbers here might not be very accurate; e.g. on the first stage I certainly stopped longer. But it gives an indication. I might look into this again and update it.
What you will see is, e.g. that
I did lots of riding until late at night or through the night (first and last two nights)
I had a couple of very weak days: with short stage distance and a lot of relative stopping time. I was simply very exhausted.
there was one long final stretch after Bjelasnica (last 830km) where I just wanted to finish the race (to 1 see my family at the finish line, to escape Albania and my condition, to overtake a few riders and have a shorter finish time). There were a couple of short semi-naps involved, but no real sleeping. See the map for details.
To zoom in and out you could also download the below picture of the timeline. Otherwise just scroll on this page
Now, 1,5 years after my Transcontinental Race (No.06, 2018, cap36), I still owed myself (and those of you who are interested) some kind of recap or writeup of my experiences during the race. And certainly wanted to do that before riding the next TCR edition this year for a second time (No.08, 2020). Now is the time, but I chose a different strategy…
I had postponed it time and time again simply because it seemed a tooo intimidatingly huge task. And equally importantly: There are already so many great text-based blog reports by other TCR-riders, so I did not feel there is a niche left. But I still wanted to do something: to relive it again, and also to make sure to refresh my memory – because it was an experience I would not want to forget.
So I set out to do it in a way that would be a bit different and also do justice to how important I find the spacial element of bike packing and racing. I wanted to create some sort of visual, geographical, chronological and data-driven representation of how my race unfolded. I chose two means, each will be introduced in a separate blog post:
Timeline of my stages:As an overview I plotted a timeline of my stages including some key data. I felt the amount of impulsive night-riding was very characteristic for my race, so I wanted to try a way to visualize how the stages did and did not correspond with 24h-days. This timeline you find in a separate blogpost.
Interactive map of my race: For the spacial/geographical element I thought there would be no better tool than creating a map in Google’s MyMaps and plot the route and spots where I slept, ate, had social moments, problems, crashes or any other kinds of memories. I also wanted to make sure that map somehow intuitively represents my day/night-riding and found a solution for that, too. You will find that map in the second-next blog post.
I also viewed this as a challenge in terms of “user experience design”: How could I get across information in the most intuitive, efficient/effective and visually clean way? Please send me feedback in case you spot something you think could be changed improve user experience/interface.
How & for whom is it relevant?
Diary for myself: First of all I did it for myself. So even if no one else would find it interesting: I would create this as a diary for myself. Furthermore I really liked the design and data-processing challenge behind it and might apply some learnings from it to future projects. I also learned quite something about the technical element of GPX files and how to alter them.
Content-level: Some of you, who have not ridden TCR yet (and maybe want to) might find it interesting to browse through some random details of my race; because here you also find information beyond the “big moments” that most other accounts write about (very interestingly). You will also find-out how often I did food stops (however my account is not complete in that respect). How my sleep patterns were. But also softer things like rider interaction on the road and other social/emotional things. You pick what you like.
Form-level: If you do bike travels or races yourself, maybe you get some inspiration by my race record in terms of how to visualize your experiences or how to use your GPS data to help your memory a little. In case you have questions about that, please don’t hesitate to drop me a line!
And here you find the two posts all that is about:
A somewhat belated newsflash! For more little and random posts from throughout the race, check my, Instagram, Facebook or Strava.
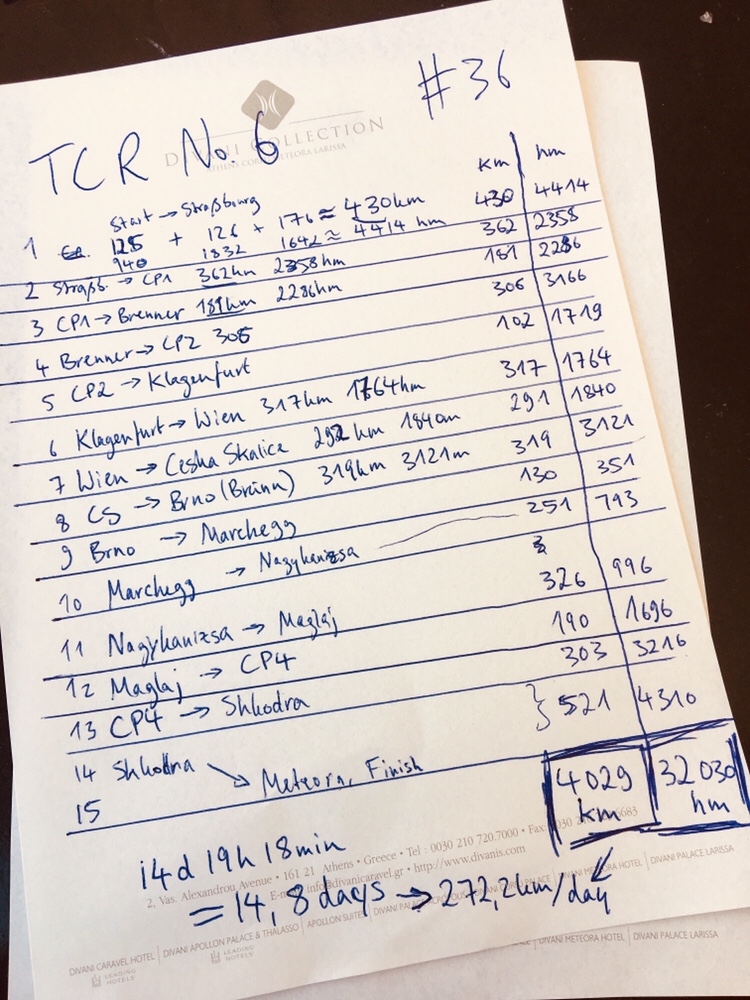
This past Monday (13th of Aug 2018) around 17.30h CET I finished my Transcontinental Race #TCRNo6 in Meteora/Greece, after 14d19h18min, 16 countries passed over 4029km and 32030m of altitude gained. (I will probably be listed around Position 65 out of ca. 280 starters)
A BIG shoutout and thank you to all of YOU who watched my GPS dot, sent me messages and comments of encouragement and interest. You can‘t imagine what an incredibly important force you were to me – who knows how/if/when I would have arrived without you..?
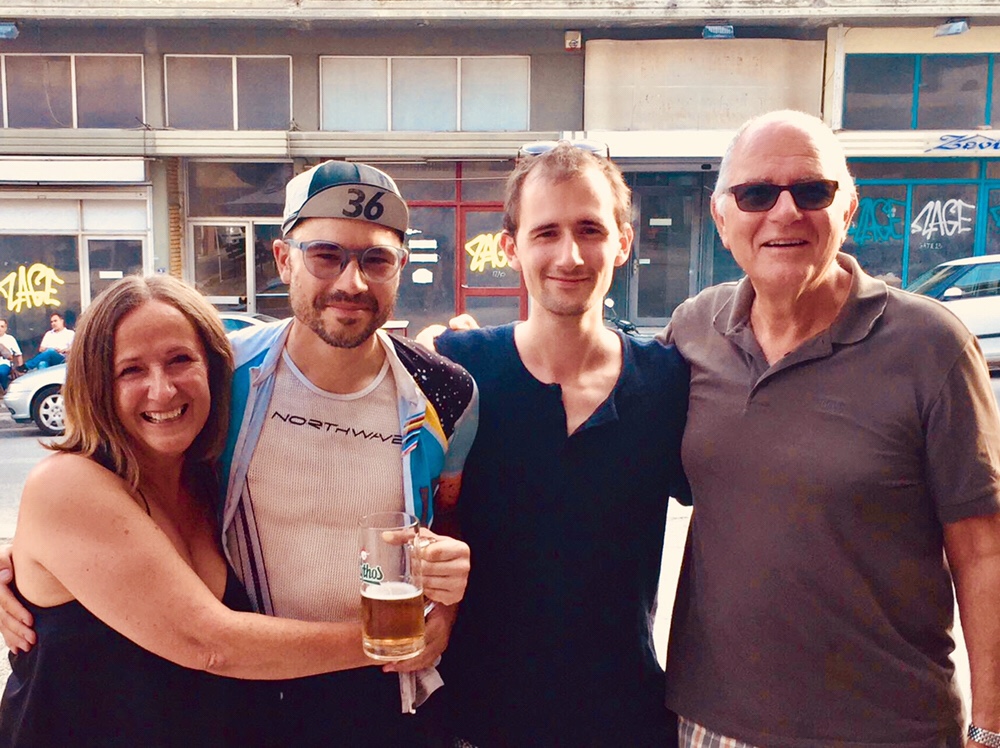
My arrival was extremely overwhelming to me as I flew down the mind blowing descent of the final parcours to then fall into the arms of my parents and brother who came all the way to the finish line (by plane though 😜). That was after a final stretch from close to Sarajevo to the finish line in Meteora/Greece: ca. 60 hours (303+520km) with just 3h of sleep including a feverish nightmare trip through the Albanian heat and night, chased by stray-dogs and starting hallucinations. I just wanted to finish this.
I am incredibly happy and a bit proud – it was a crazy journey that will accompany me for all of my life. Many ups, downs, beauty, ugliness, happiness, comfort, love, anger, fear, ecstasy, physical pain…
I will certainly publish various notes/articles on this blog some point. If you wish, you can enter your email address (see column on the right) to find out when I posted something (no spamming of course).
Yours, Malte / Cap36
#TCRNo6cap36 @Meteora
Here are some visual impressions as I had also shared them on my social media channels for this “finished” post:
Family reunion at the finish line
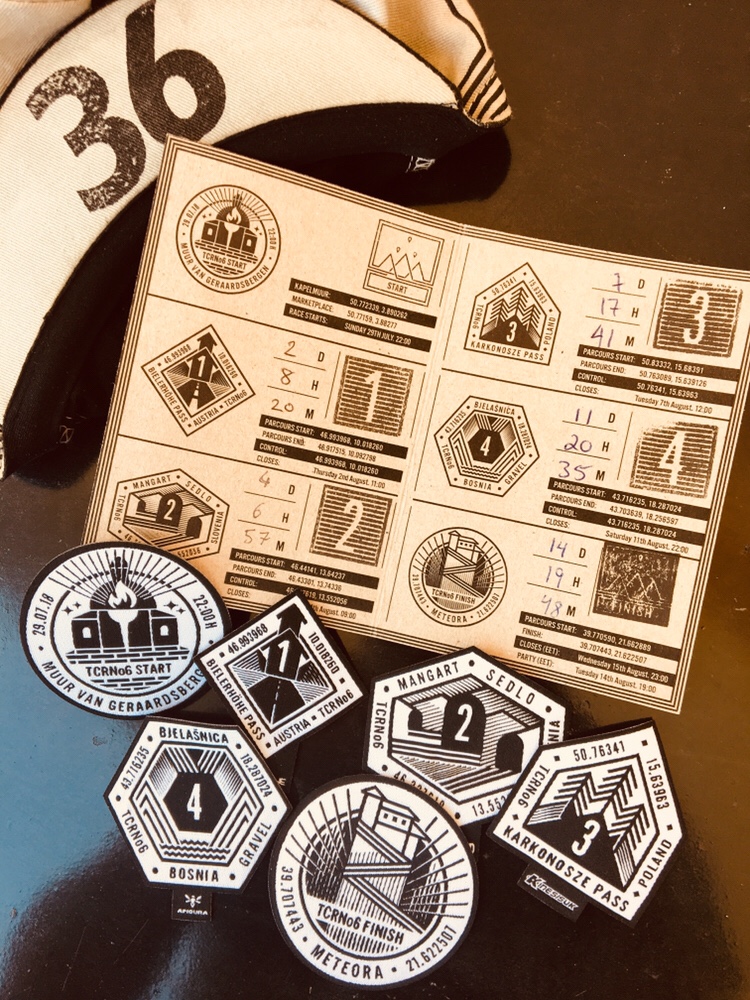
Summing up my stages. With a slight tremor in my hand..
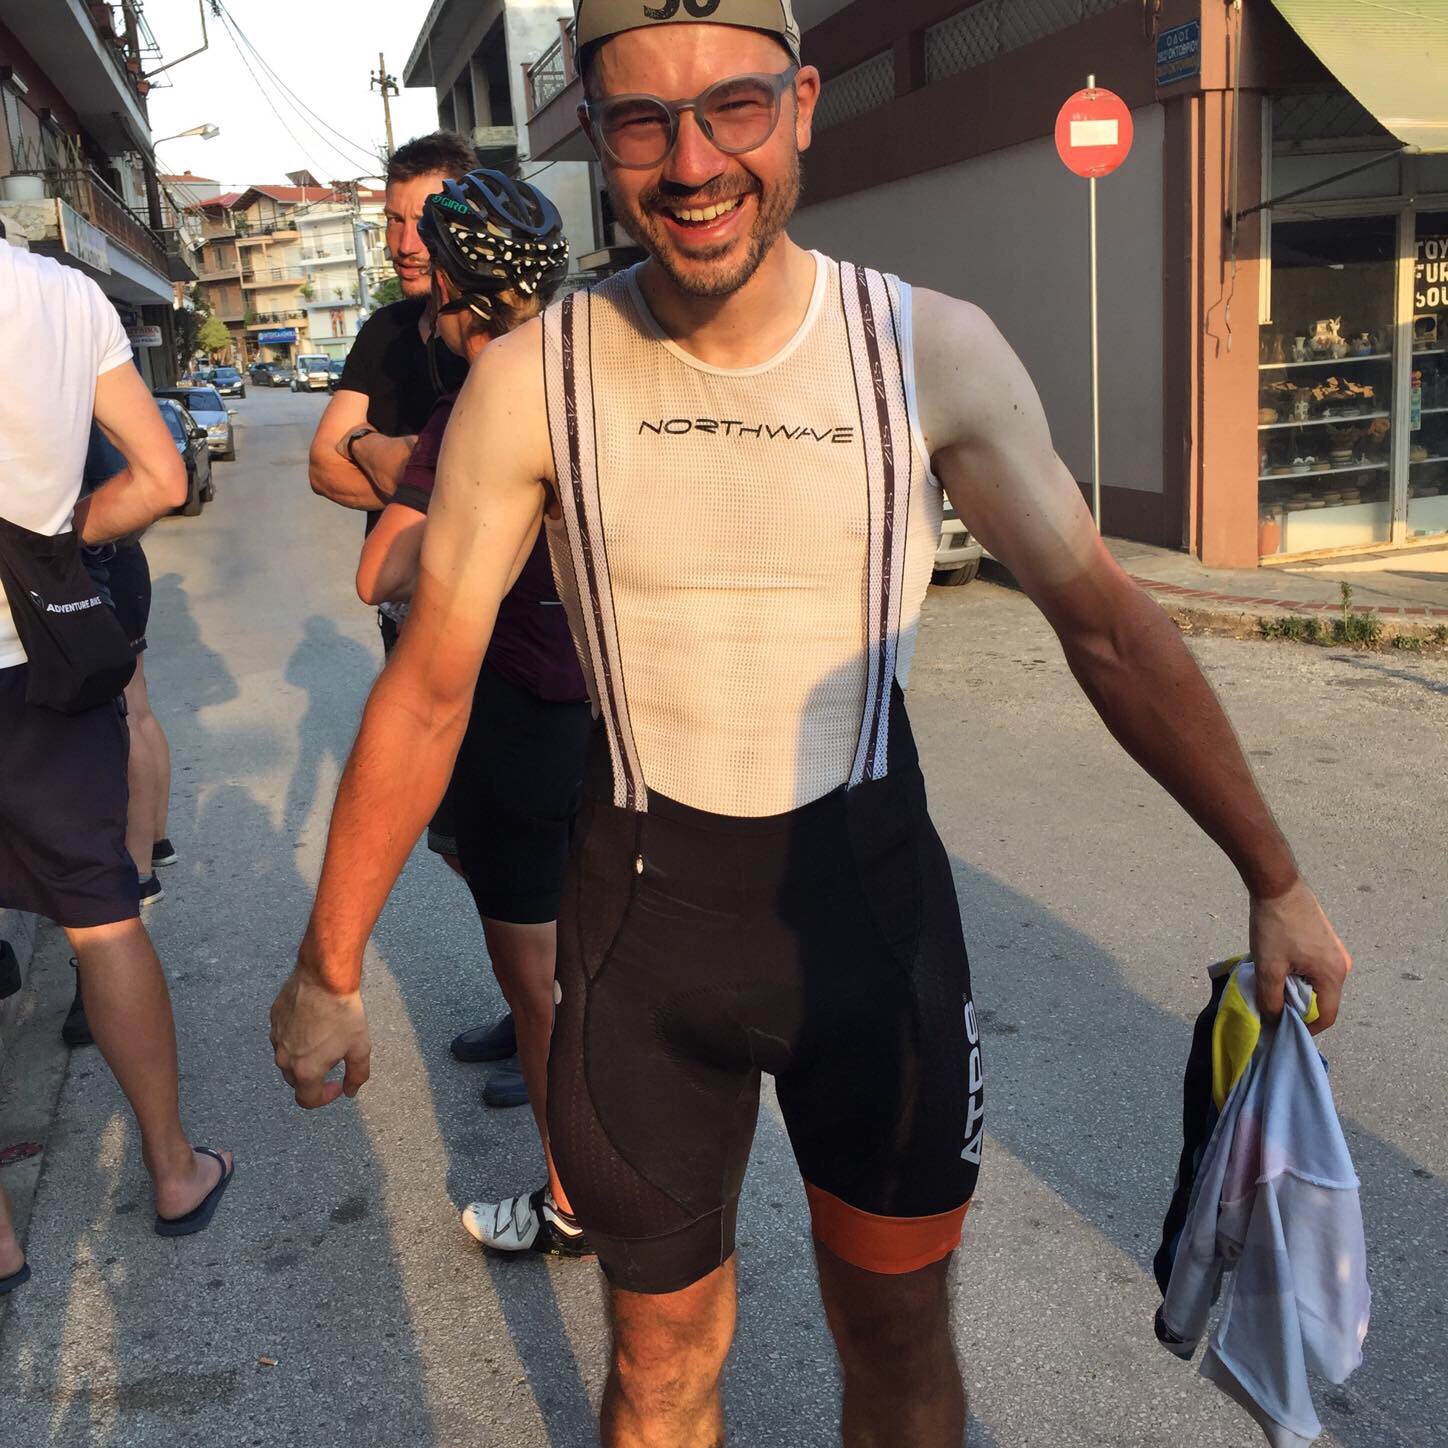
Tan lines…
Leg comparison (and showing of the ATPS logo on my bib shorts)
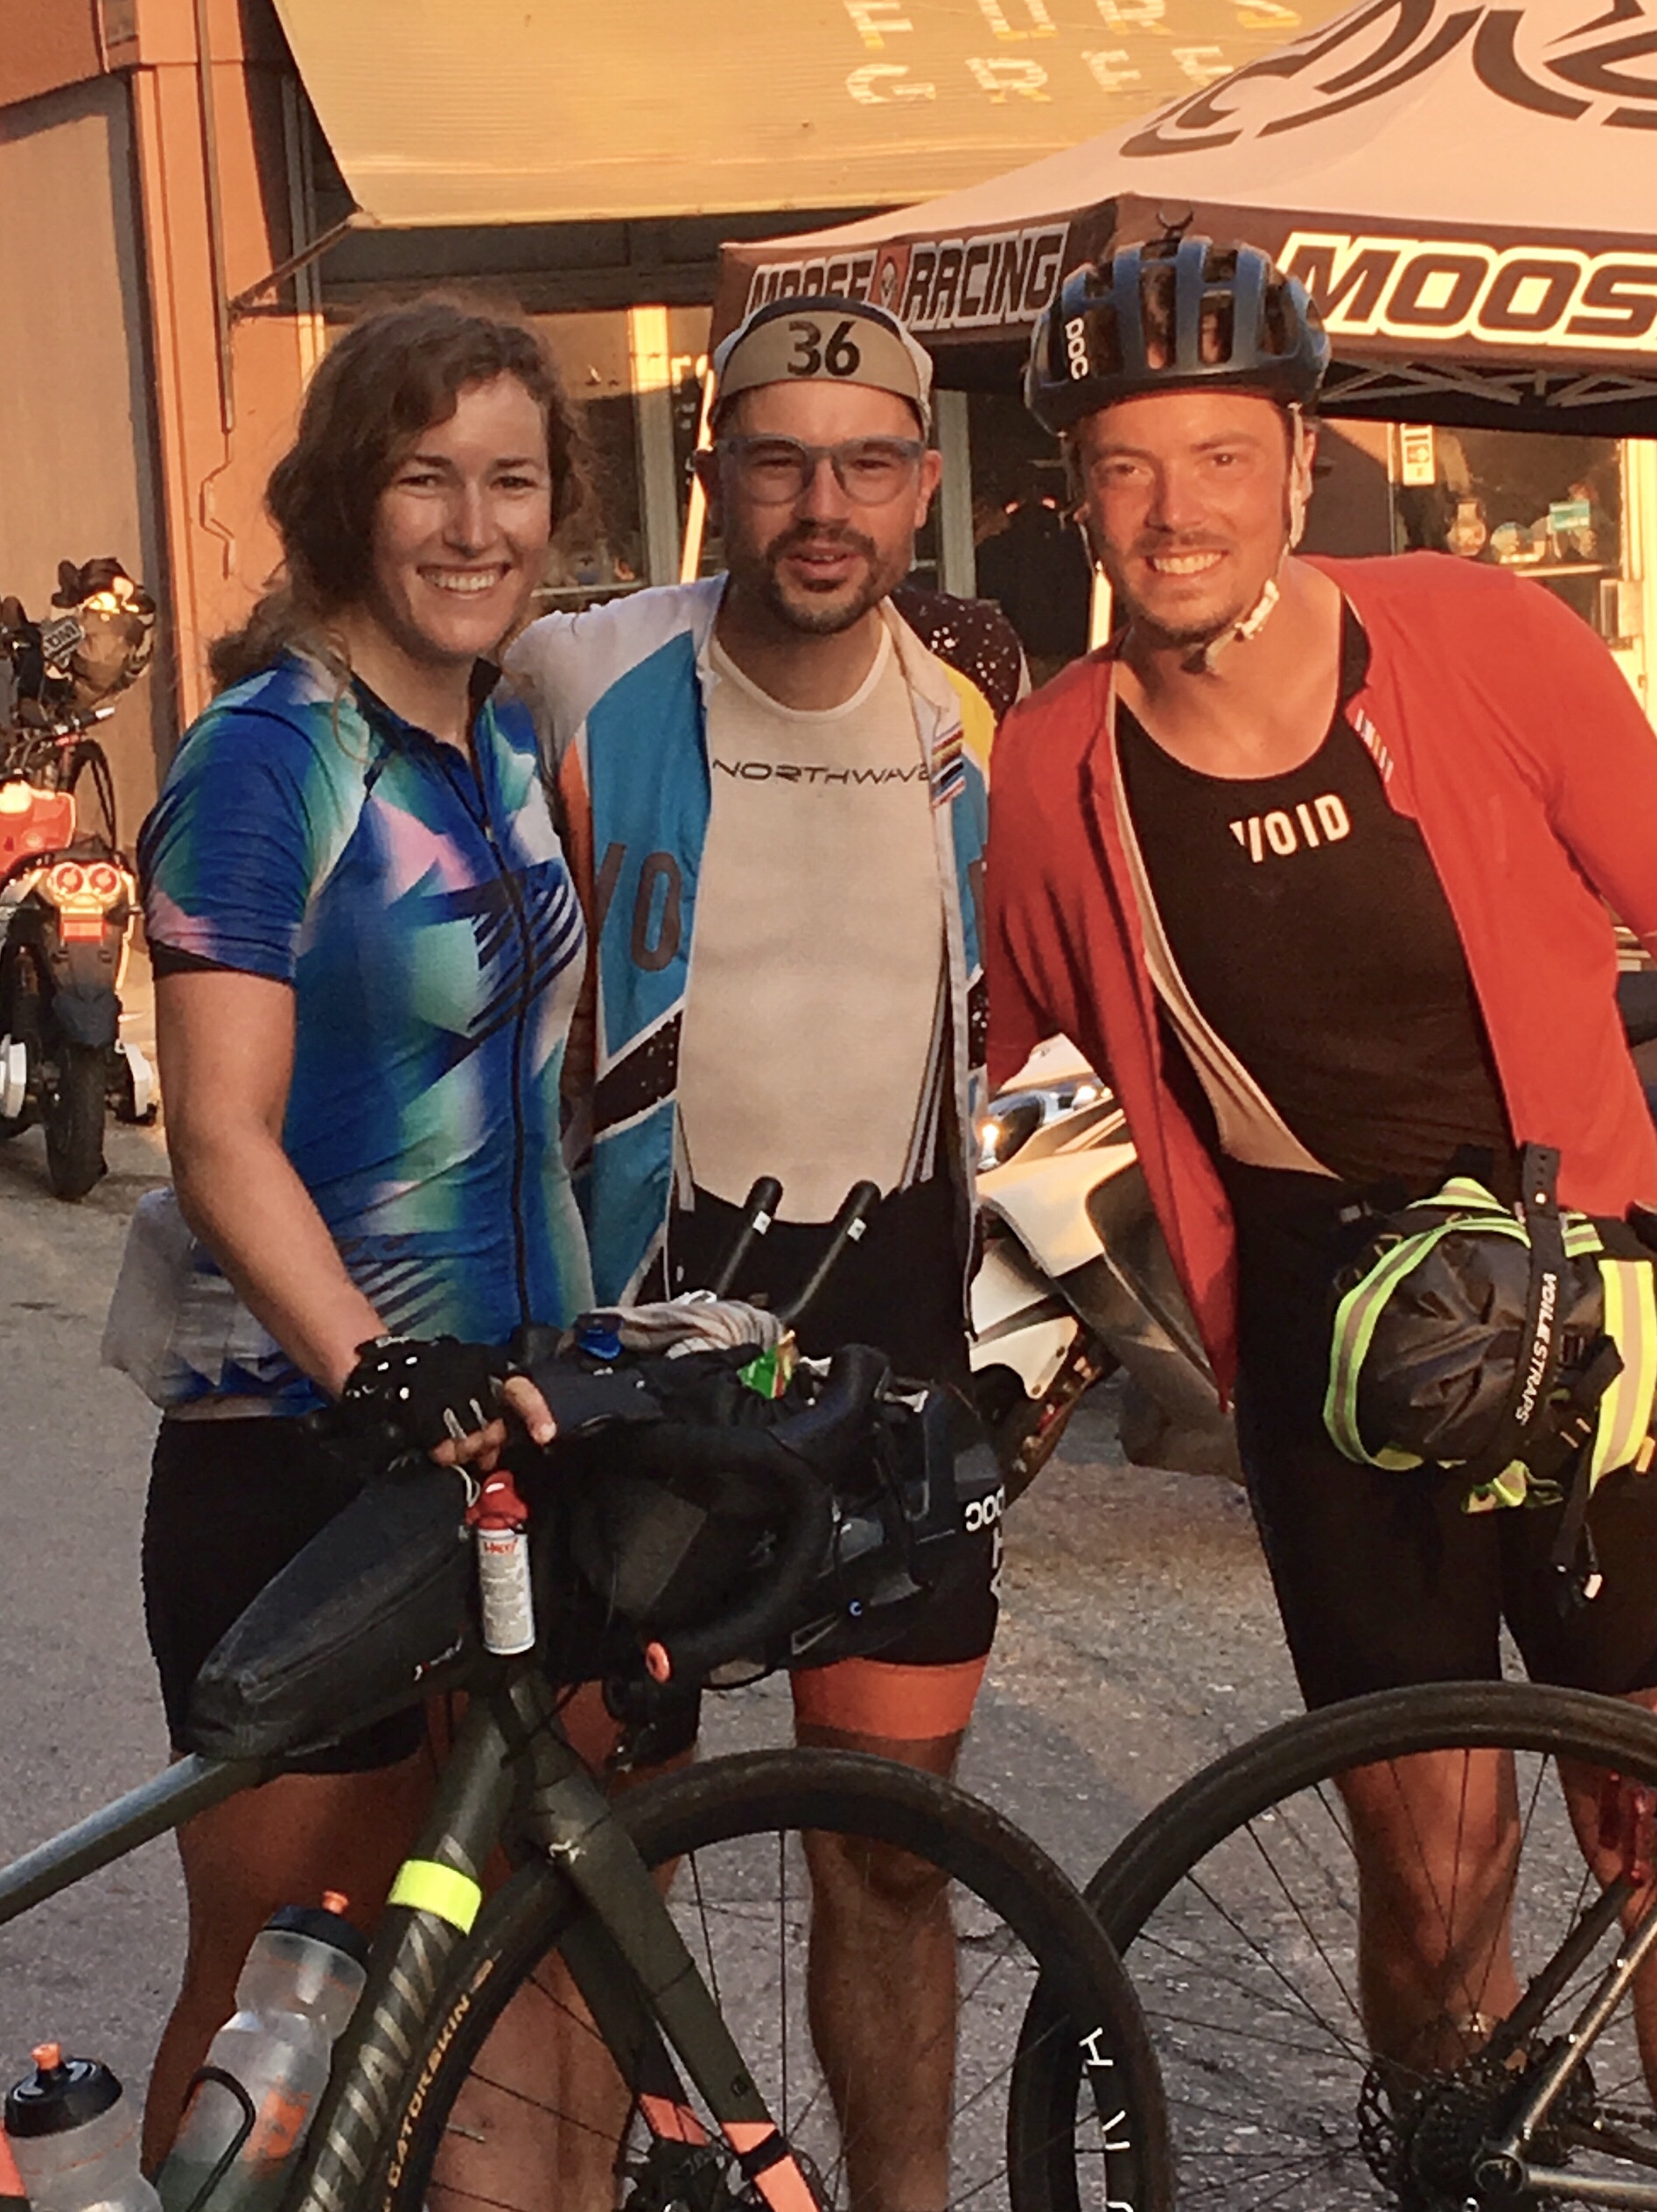
Amy and Anton – on the last morning before my finish they approached me from behind in the flatlands of Albania. I was mentally not in a good place so their unexpected company meant the world to me
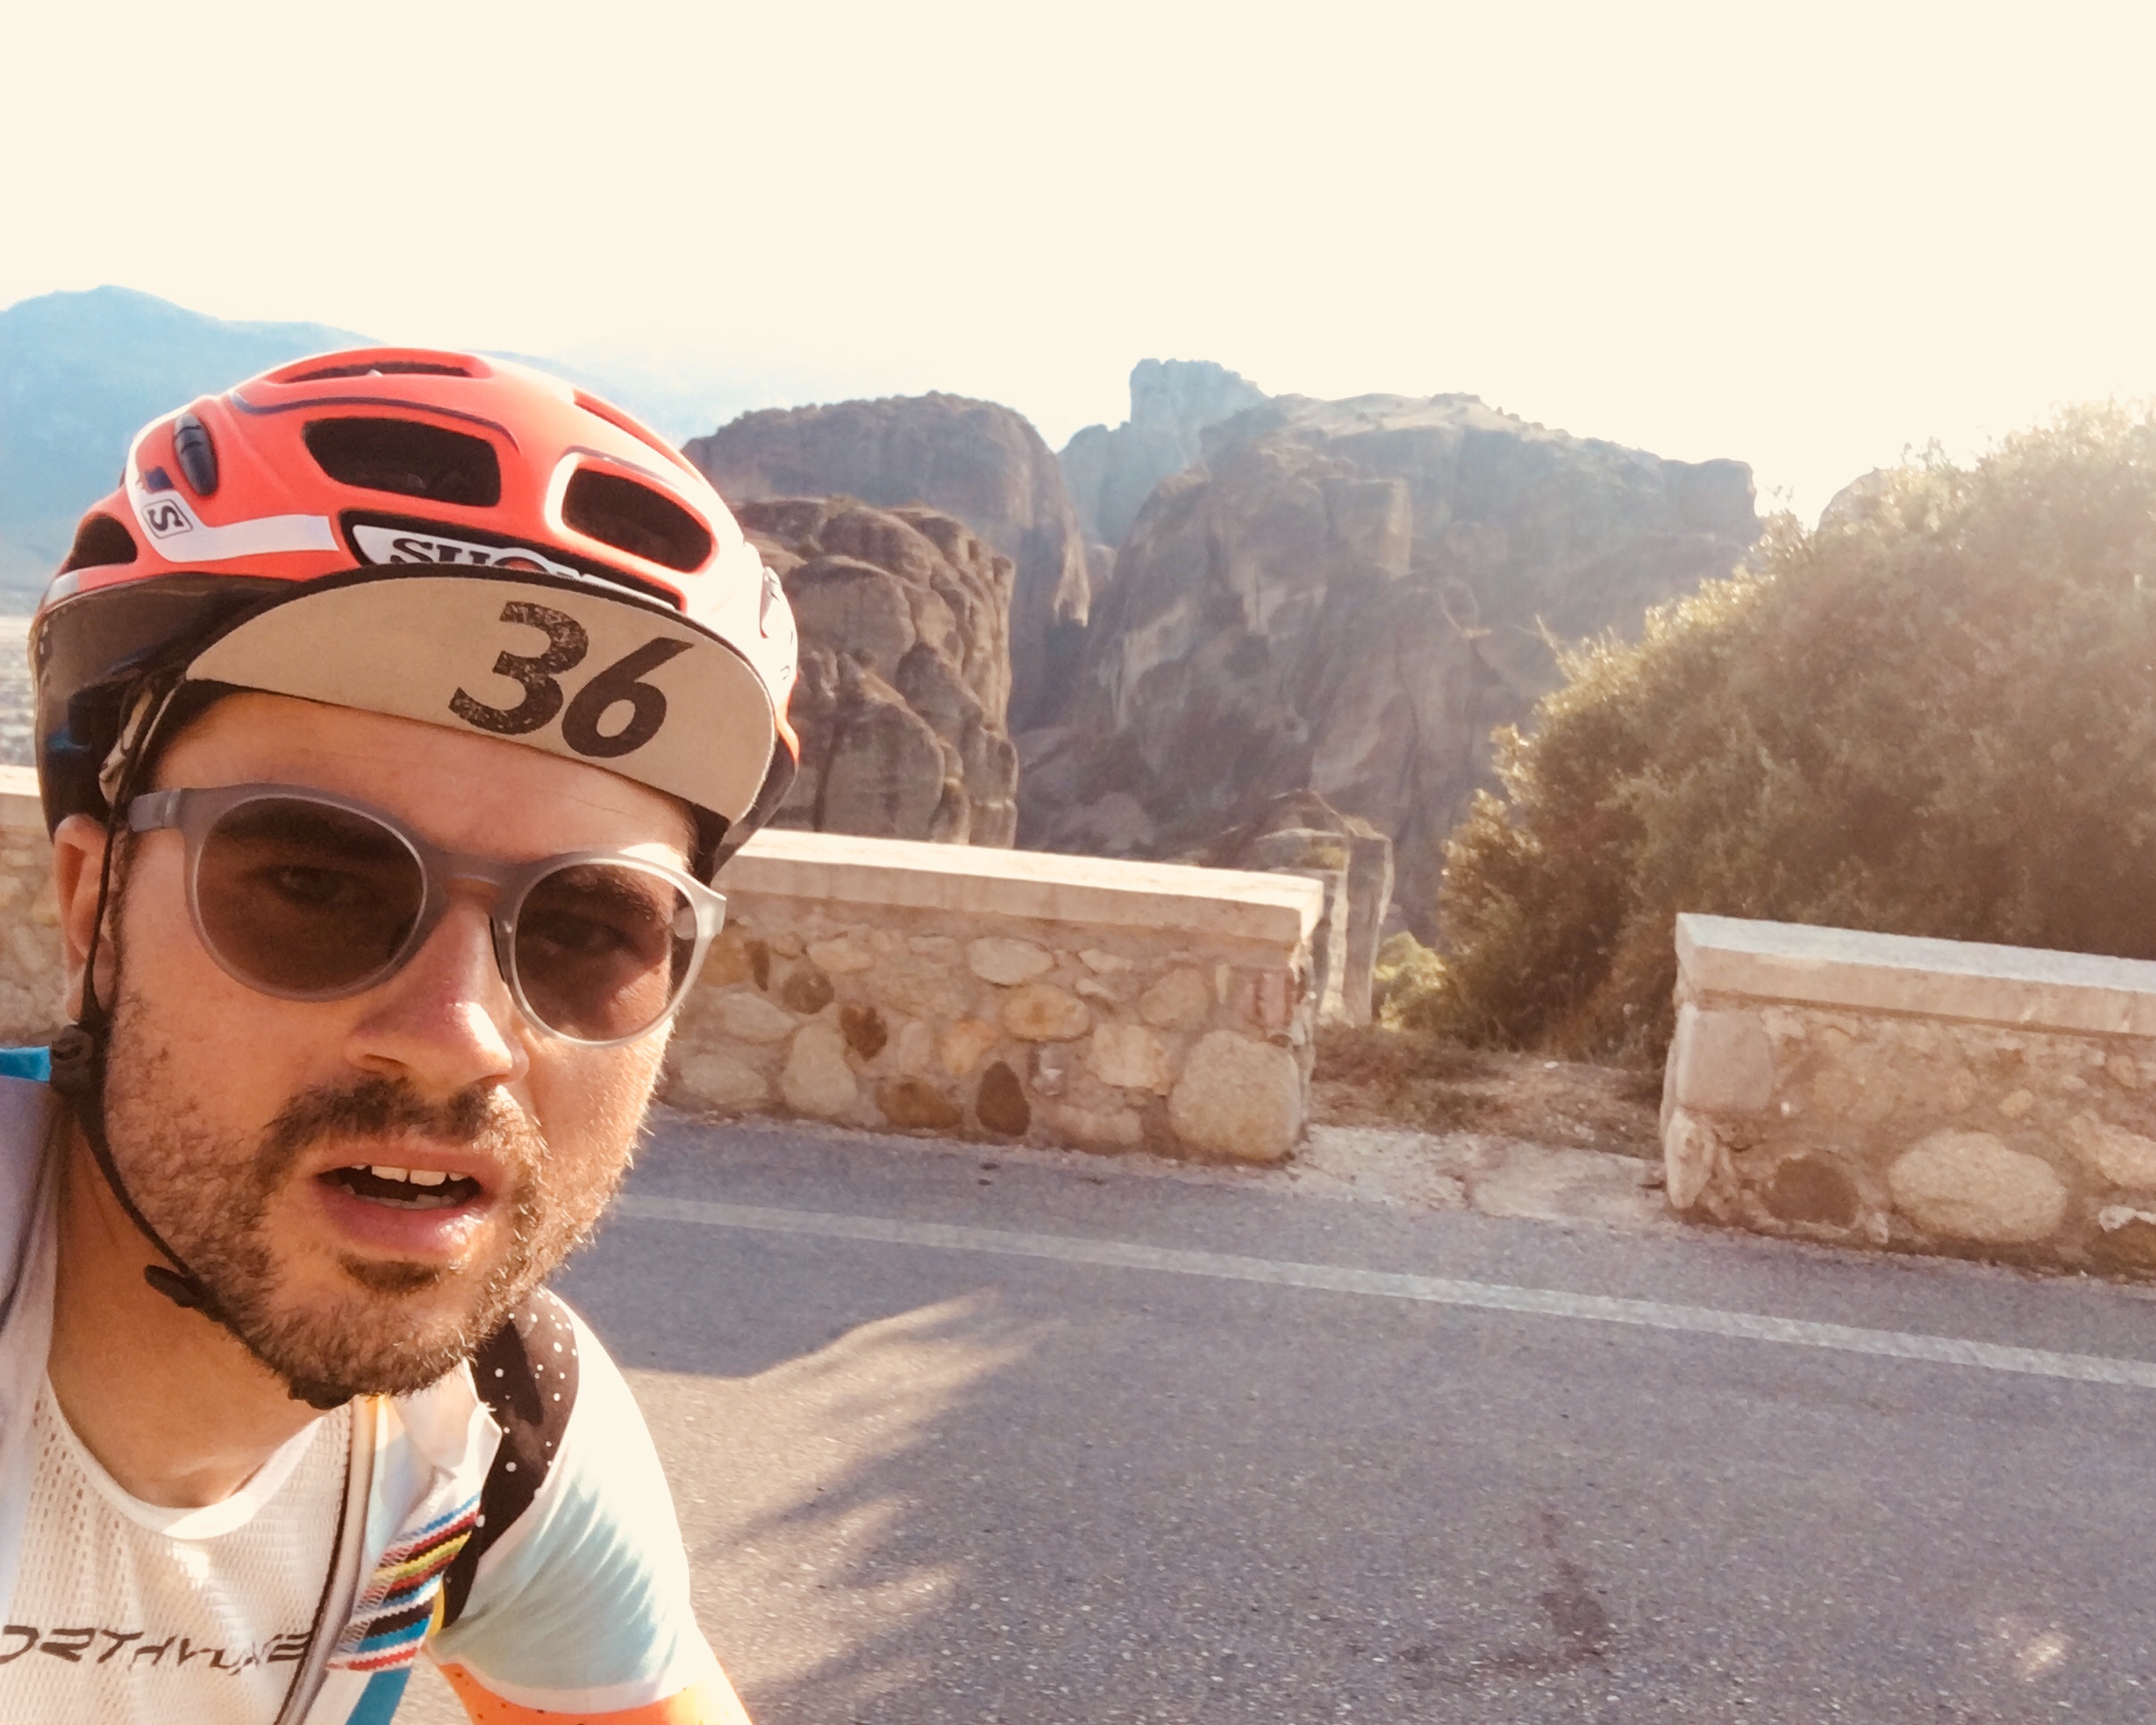
Selfie attempt on the final parcours down to Meteora
There are many ways to approach this endeavour. Here’s what each of them would mean to me. In order of importance and intensity to me:
survive. That would be nice!
finish in any time. I would have had a fantastic adventure that surpassed any cycling I’ve ever done. I’d be incredibly happy and thankful!
finish for the party. Oh Lord (or whoever), this would be unspeakably overwhelming to me and make me very very proud (I’d have to admit). I would be able to share an evening with many heroes. And some days with my parents and brother who will be there for me!
finish a few days before the party. Wow, I think it would take me some time to process how this could have been possible. I will check my agenda a couple of times to be sure I didn’t make a mistake and mixed up the dates. I would also consider that I was unknowingly involved in some time travel experiment by some alien civilization. Also a ripped time-space continuum or a glitch in the matrix would be options to consider.
As you can see, none of those points involves my placement among the riders. What other riders do affects me in the sense that it can be inspirational benchmarks. They will show me what could be possible and will certainly keep me sharp and make sure that I won’t be hanging around. But primarily I will experience my trip just by my own standards.
What motivates me…
(In no particular order)
My parents and brother are waiting for me at the finish line in Greece. If I manage to arrive (let’s assume I do), that will be one of the best things.
That drive to make it! Would take too long to explain in detail; it has to do with independce, agency, learning, achievement. You can also check my “approach” section in the “about” menu
The sense of community among riders. We will all go through the same and will understand each other. That is very new to me, since in the past I was an almost exclusively lonely rider (apart from many friends following/encouraging me online! And one great duo trip with Jon through Japan)
Stunning scenery. Especially looking forward to the parcours! I have the feeling the organizers of TCR really have a good feeling for dramaturgy! (independent from that strange excursion to Poland : D )
Arriving on top of the pass. And then descending for ages.
Insight & connection. Into myself and how I cope with adversity. And into the world because I will again very tangibly have experienced a part of our blue marble. (Attention, seeming corniness ahead! But I mean it) I think an important part of my/our kind of cycling is that it allows us to bridge some of that very natural and archaic gap/detachment between our inner and our outer world.
International exchange. Among the colourful bunch of riders but also across the nations of Europe.
“You have nothing else to do than cycle. So you’ll automatically move ahead” That’s a paraphrased quote by Ultan Coyle; a crazy, very successful and also very kind and humble Irish TCR veteran. I had the chance to have a chat with him after a short presentation of his in Berlin. I found that actually very eye-opening!
What I fear…
(in that particular order)
Stray dogs. I’m really not a “dog person” – as long as they’re not on a leash, they terrify me! (ah, btw. is there a linguistic link between “terrier” and “terrifying”?). I have no idea how to interact with those beasts.
A sore arse. No need for explanation.
Crashes. Not so much from traffic (strangely), but rather from slipping in a curve or from falling asleep, or because of:
The heat. In particular its effect on my circulation. I know I can get headaches from heat
that my body wont keep the food down. I’ll need tons of calories and I know the feeling when the body can hardly take any more. In contrast I also fear the almost inevitable moments of “hitting the wall” due to under-fueling
Sweat in my eyes. I burns so bad.
That the route might not work out. Despite my confidence in the research I’ve done… you never know.
All that’s left to say…
I wish all my fellow riders a lot of fun success, health and a great adventure. – I wish dotwatchers and friends and families a lot of fun watching and supporting their loved ones and that they will have a lot of good sleep at night because it’ll all be fine. – I’m thankful to the organizers of the TCR and wish them a smooth event and as much time as possible to enjoy it together on the road, too!
Lastly, once more:
You can follow all the riders’ GPS dots on their individual routes across Europe on
[ATTENTION! This post may be boring to some (and interesting to others), because I go into quite some technicalities further down. Reading at your own risk!]
What makes TCR and the preparation special?
The Transcontinental Race (TCR) is not “only” a regular bicycle race because it is not just a comparison of physical performance. Consider these features:
TCR is a self-supported race. That means: no outside-assistance is allowed. Riders are not allowed to cooperate in any way (unless they formally entered the race as a couple). No drafting, no sharing of food or equipment, no friend waiting at the side of the road handing a banana and no food or sleeping places provided by the organizers. It’s supposed to be a solo bicycle tour.
There is no fixed route. There is a start point and finish line, and 4 Controlpoints (CP) in between that have to be reached in order. At each CP there is also one parcours that needs to be followed exactly. But apart from that each rider needs to research their own route to navigate as smartly as possible between all CPs.
The clock never stops. So there are no scheduled breaks, no fixed stages. If a rider rides through the night while others sleep; well, then he/she gets more miles done and finishes quicker.
Those features mean that riders have to be extremely independent, well prepared, experienced in routing and navigating, efficiently equipped, know their gear and how to fix it, have high resilience (e.g. when sleeping outside in the ditch), need to know themselves very well. The winners (or even finishers) are not those who are just strong cyclists. But those who also make the best decisions, prepared thoroughly and manage to motivate themselves also when facing adversity.
As a consequence, I, too, prepared a lot (enough?). Here I’ll go into:
Training
Route planning
Gear adaptations
Training
I never really trained for cycling. Because what I love about cycling are all those touring experiences; but a short quickie around the house..? Never was my thing. (see “approach” in the menu) Last year for my Freiburg-Barcelona trip was the first time I deliberately did some more riding before the summer. This year 2018 had to be very different of course. I’d say a TCR attempt without physical preparation cannot even be called an attempt.
The sensible thing would be: Set up a training plan, do 5 road bike rides a week, practice various disciplines (sprint, mountain, endurance, etc.)…
Did I do that? NO – despite my best intentions to do it.
So here’s what I DID do:
The most important training: In March I got my old trekking bike from my parents place to Berlin and set it up as a real good city bike. From one day to the next I didn’t take any public transport anymore. I did all my trips within Berlin exclusively by bike. And crucially: I always cycled with very high pressure! When I didn’t feel my leg-muscles at work, I simply went faster, also trying to get my circulation going. Seriously: I’m convinced that habit made all the difference – maybe 75% of my current fitness level!
I estimate that I did on average 15km per day. For 5 months (March-July) that’s 2250km under high pressure. (I did not record those on Strava). Clearly that kind of riding style in the inner city earns you some strange looks – if the observer’s eyes were fast enough to catch op with that lightening of a cyclist.
I already did one or two rides in January. And was surprised in what poor shape I was (I think one has to be stupid for being surprised about this after a fall and winter of sportive nothingness…). E.g. I got dropped by the local peloton (albeit a high-pace one); completely overestimated my physis. As soon as I knew I would do either NorthCape4000 or TCR I started mounting my horse 1/2 or 1 time per week. By March, April it got a bit more. I think I had probably 1 1/2 rides per week, often around 70-90km. Again: I really tried to push it when on the bike. No lazy rides. I even started enjoying this battle for speed! (I previously found no pleasure in it).
I ended up having 3200km in the bank (road bike riding) before TCR. That is really not much; but much more than I had done in previous years.
I also did a few long distance rides. Those were:
620km, 4300m in 2 days; from Berlin to my hometown Essen.
323km Berlin-Hamburg in a day. Very flat route. This was a great pacing exercise
208km, 2671m through the “Thüringer Wald” with full TCR gear (inkl. luggage). Starting at 3pm in Erfurt and riding until the early morning hours. To see how my clothes were doing, to train some climbing (not much to climb around Berlin) and to try again how sleep deprivation on the bike feels.
And quite a few shorter day-rides in the 160km range.
However: 3 weeks before the race some mechanical issues came up with my rear wheel, in combination with many commitments at work and privately that kept me from riding. And coincidentally somehow I didn’t feel like training around that time… I wanted the real thing to start! So I had a break of 2,5 weeks and after that just three rides before the race (50k, 150k, 40k, high pressure). I hope this break didn’t ruin it for me and trust that it’ll all come back within the first race days. According to my experience I get fitter during the first few days of a tour; at least in case of my more relaxed touring (like last summer).
In any case: That was really not particularly much training. But still: That way I was fitter than ever before in my life! That does not mean “fit enough for the TCR”, of course. Whether I’m fit enough for it will only show while I do it.
You can check all the road bike rides on my Strava(not my commutes in Berlin) – and btw also each day of my TCR attempt; will upload instantly (whenever possible)
Route
To me, all preparation was fun! But especially the route planning. Because here you get a first feeling for the geography; get a first glimpse into foreign terrain and it very much inspires to daydream about what it would be like when I’d physically traverse those places. Additionally, route planning is also intellectually quite a challenge. You have to make tradeoffs all the time and draw from your experience to judge what a certain thing on a digital map might mean in reality…
I spent hour after hour, evening after evening in front of the screen; for weeks: Scrolling down, zooming in, copying, dragging&dropping waypoints, bathroom break, promenades through StreetView, changing window, downloading GPXs, a sip of Coke, deleting GPXs, renaming and sorting routes, merging/converting/up-/downloading files…
Some of my planning results are:
3950km
37000m elevation gain (according to Komoot)
16 countries
19 border crossings
I think I found a rather efficient route. It might be that in some instances I made decisions that differ quite a bit from what other riders will do. But in many cases there are only few obvious choices, of course.
Planning tool: I tried around a bit. In the past did everything with “mymaps” (by Google) and GoogleMaps. Then in January tried RideWithGPS and Komoot. Finally Komoot (paid version; incredible value for money!) turned out to be the handiest tool. Especially since by then I had also switched to a Wahoo GPS unit (see below) that communicates seamlessly with Komoot.
Goals & Tradeoffs in route planning: The most important parameters are…
shortest possible distance
least possible amount of climbing
best possible pavement
Roads have to be allowed for bicycles
border crossings need to be open
Those are many things to factor in. To get proper pavement I firstly relied on Komoot to suggest a proper route (Komoot actually checks official road entries of municipalities to verify road conditions). Then I checked the pavement with StreetView. Where that was not available I had to make guesses based on how the road is labled (large enough?) and how it looks on Strava-heatmap. I focussed on main roads. There is still a lot of uncertainty.
For the best tradeoffs between low horizontal and low vertical travel distance, I simply compared several route options next to each other, switching forth and back, routing over and around hills. To get a feeling for which basic options there are on a large scale, I used the terrain-map-layout in GoogleMaps because it illustrates elevation and mountains in a very useful way.
For border crossings I usually assumed big roads to be working crossings. But also checked on Wikipedia and some dedicated websites. In one case (Bosnia to Montenegro) I actually contacted the German embassy aswell as a local police station. The information I obtained that way had impact on which option I chose in the end (namely the more risk-averse one).
It is not always easy to know whether a road is allowed for cyclists. It is very important to know though, because riding forbidden roads can get you disqualified from the race! Especially Hungary is a nightmare. So there I literally traveled along all the possible roads with StreetView to look out for “no bicycles” signs (thankfully there’s StreetView there!). However, StreetView images are usually not up to date. So there is a lot of uncertainty left. E.g. for hungary I prepared two routes: a fast one and a safe one; similar for Czechia.
I am still considering to complete a list of towns and roads to pass and have a printout of it with me. If my time allows it, I’m certainly going to do it!
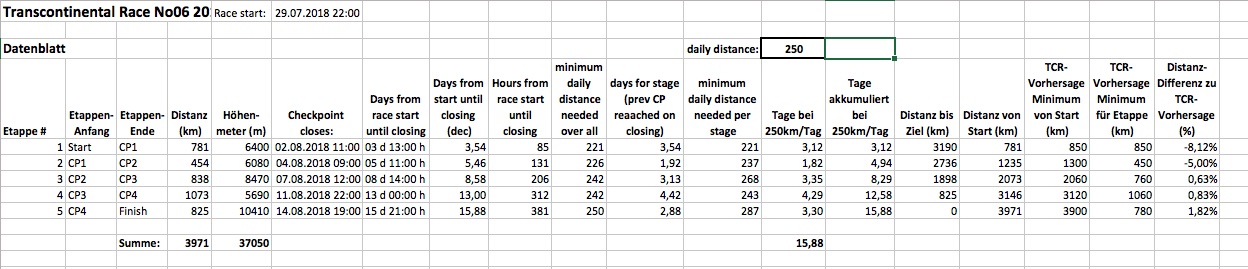
I also played around with excel to calculate all kinds of things, including a scenario automation based on the km I’d on average ride per day and including the closing times of checkpoints. I won’t go into detail now; but so you get an impression, here you find a screenshot. However: It was more for fun and out of curiosity. In the end all calculations don’t help… I have to cycle it anyways: (click to enlarge)
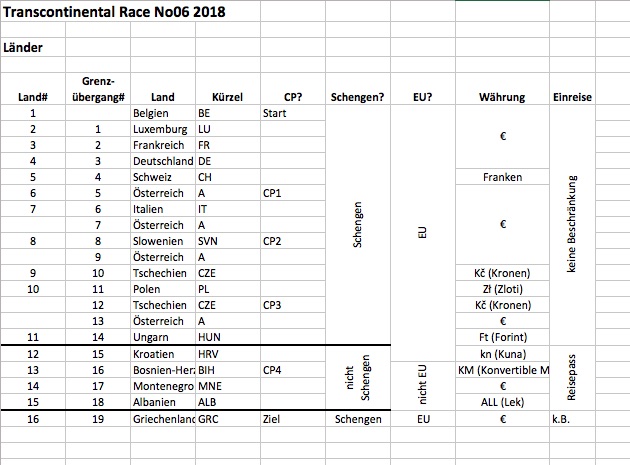
And here’s an overview of the countries:
Gear adaptations
For detailed info about this years set-up, check the “gear” tab in the main menu.
I used the cold winter months in Berlin to do research on adequate gear.
My past trips were all rather leisurely: always with rest in the evenings, days off and some spare days at the destination. All that spare time needs additional equipment (e.g. normal shoes, civilized clothes, etc.). The TCR however demands much more time in the saddle, much more efficiently; so I had to rethink my setup to make it..:
more compact
higher performing
as multi-functional as possible
lighter
(in that order. weight really doesn’t matter soo much)
During the past months I did a lot of research: read blogs, followed forums and facebook-conversations and also was in exchange with fellow future or veteran TCR riders. So I learned a lot from other people; it was a very rewarding experience (shoutout to the TCR Facebook group (English) and attached TCR community!).
The following are the changes I made compared to the last years: (You can also check my “gear” menu at the top of the page to see pics – at the bottom of those gear pages you also find links to the previous years’ setups)
GPS: Garmin Edge 1000 -> Wahoo Elemnt
My Garmin was always a reason for worries – so many glitches, so cumbersome to handle. And on a tour, especially TCR, the GPS unit is the one thing you REALLY need to be able to rely on. I had read up a lot about the Wahoo devices that recently entered the high-end bike-GPS market as the first serious competitor to Garmin. I decided to get a Wahoo Elemnt; and do not regret it at all! It simply works. Is very easy to handle. The fact that most of the setup happens on the smartphone makes it even better.
I only had some issues with the speed meter. But Wahoo’s E-Mail and phone support is excellent! So all worked out. There are certainly also some things missing or not working like it would be best for long distance trips (esp. at night); but no show stoppers…
I even decided to not bring my Garmin as a backup, but rely on my phone as a backup option (and/or buy paper maps in the worst case).
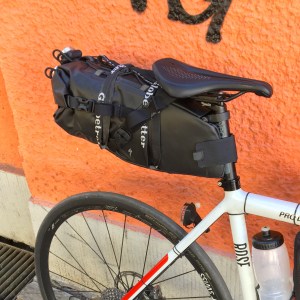
Backpack -> Saddle bag
Specialized Bubba Seatpack 10L
In the past I was a defendant of backpacks on road bike tours because I did not like to have much stuff attached to the bike; and strangely it gave me more of the “travel vibes”… hard to explain. Also, my Vaude Bike Alpine pack was a great piece of equipment!
But I changed my mind; I realized that having a free back is indeed much much more comfortable the longer the rides are (other people knew it all along). And comfort is really criterion #1 for these trips! So I followed what I had by then seen many times: I bought a seat pack (and consequently also ditched the rededicated rack that I used last year). I had a look at virtually all options out there (online) and finally went for theSpecialized Bubba 10L. I went to a local Specialized dealer (Pedalum Mobile. Thanks!) with all the relevant gear I wanted to stuff in there, and test-packed the bag to see if I need the smaller or the larger size (10L is the smaller one. Obviously also bought it there). I chose that model because a) it is very compact, but more importantly b) it is held in place by a tiny aluminum frame under the saddle, so it wouldn’t swing left and right. Because one thing I loved about my strange rack-construction during the last years: it was rock solid! A swinging seat pack would drive me nuts.
To get the bag in the right position (horizontal enough) I needed to attach the little aluminum frame with its clamp has high as possible on the seatpost. That was not possible on my previous one, so I had to get a new seat post. I got one where the tube remains straight for as high as possible; still it turned out it was slightly wider at the top so I had to use a rasp on the clamp of the bag to make it all fit. Quite a hassle, but now it fits perfectly.
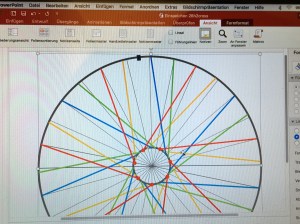
Rim dynamo -> dynamo hub
“wheel lacing design” – with the super professional technical drawing software “PowerPoint”… purpose: to better picture the lacing layout…
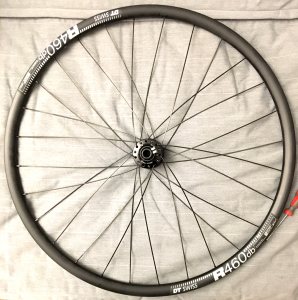
This was a very important change. I have praised the super efficient Velogical rim dynamo in the past, and I still do! For some purposes it may be great. But for the TCR I need a rocksolid solution to power my lights and devices on the road. So I did a lot of research on what rim/spoke/dynamo hub combinations make sense. Luckily DT Swiss sells a rim that is identical to the one I already have on my backwheel (R23 Spline db) and I ended up choosing 28 spokes (DT Swiss aero spokes). For the dynamo there are only two viable options: the cheaper Shutter Precision (SP) from China or SON from Germany. No doubt: both are great
SON dynamo hub laced (no tension yet)
hubs and also the SP is widely accepted and proved. But after I had ordered an SP it somehow felt cheap… Maybe the peace of mind and trust in gear is more important on the road than the actual differences in quality; so I decided to pay quite a bit more and get the SON hub.
I laced the wheel myself and intended to bring it to a wheel builder to just put it under tension and true it. But (luckily!) he discovered I made a mistake in the lacing; so he turned the spoke/wheel combination by one hole (shout-out to Komponentix in Berlin! thanks a lot!). I’m sure that on some pictures you noticed the “wrong” position of the valve in the wheel 😉 so that will always remind me of that wheel building episode…
Speaking of wheels… I brought my wheels to that same wheel builder just for a “routine checkup” 3 weeks before the start, not assuming anything to be odd. Hell was I wrong! He found that in the back wheel many nipples got stuck, so he couldn’t true the wheel and had to replace all nipples first. The bearings were done and there was plenty of play in the freehub, so those needed replacement, too. Thank God (or whoever) did I do that checkup. He fixed those things and now it should all be good. Don’t want to think of what might have happened if I had noticed that stuff way into the race…
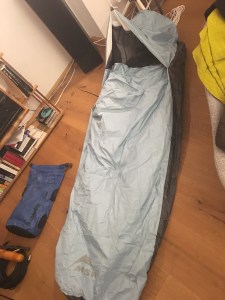
Tent -> Bivy bag
MSR AC-Bivy. Sorry for the poor pic
A tent is nice as it is really like a home and provides a lot of shelter, privacy and space to move and breath. But: pitching a tent – and especially packing it again – is extremely time-consuming. Probably the overall time I had spent in the past with pitching and packing cost me the equivalent of 50k of riding per day. On the TCR that can be an arrival difference of several days! Additionally a tent weighs much more than a bivy bag but more importantly takes more space on the bike. I got the MSR AC-Bivy,primarily because it has a zippable mosquito net – ’cause bugs drive me crazy and can really deprive me of my well-needed sleep.
Sleeping bag -> Silk liner
That was not an easy choice… sleeping bag = warmer but bulkier | silk-liner = smaller, less insulation. In the end I decided to go for the silk liner only. Honestly I never tested it outside in the bivy, so I’m really taking a risk here, but my front (under the aero bars) is SO much more compact/aero/light. I just think that it will be cold up on a mountain pass, but not further down. Also, the more south I go, the milder the nights will be – I hope.
I picked a liner from Globetrotter that felt as much like cotton and as little like plastic as possible and that was densely enough woven so it would at least feel like giving shelter in case I’d use it without the bivy.
Gearing (cassette) 11-32 -> 12-36
The organizers of the TCR really like to torture us… on those obligatory parcours they send us up gradients of up to 22% – that’s insane. And since I’m not an experienced/trained climber I really need very light gears. Last year I went down to a combination of 34-32 (front-back), this year I got a SRAM-cassette that goes down to 36! So I will have a 34-36 gear with a ratio of smaller than 1 (= back-wheel turns less then 1 time per full pedal stroke). Just as an example: According to the incredibly interesting and resourceful ultra-endurance blog “RideFar” (by Chris White), even James Hayden (last year’s TCR winner) said he could sometimes have used something lower than 34-32 – so going with 34/36 was a “no brainer” for me. Anything lower would have required majour component changes though that I was not willing to do; and: we’re just talking about a tiny percentage of the route where I would actually need or like to go lower (I hope!!).
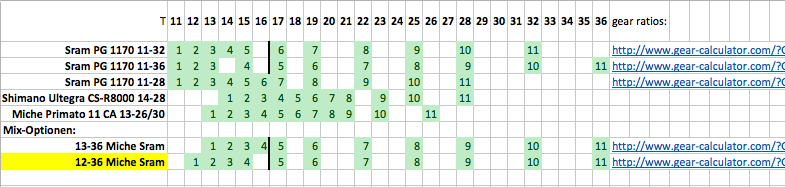
However… the SRAM cassette was an 11-36 cassette; given that it’s still 11-speed of course it means more spread-out gears (namely: 11-12-13-15-17-19-22-25-28-32-36). There was particularly one gap that was really odd and annoyingly large in an important range (namely the 30km/h-range; between the sprockets 13-15-17). So I built my own Frankenstein-cassette (to insert a 14). Bought some parts from Miche and got rid of the 11-tooth sprocket and used the now free sprocket space to fill the annoying gap.
The outcome: SRAM/Miche-Cassette 12-36 (12-13-14-15-17-19-22-25-28-32-36)
In hindsight I’m not sure how much I really gained from the following rather analytical approach to cassette design; actually I’m sure I over-analyzed things and there would have been simpler (also rational!) arguments to come to the same conclusion. But I had no idea where to start, and of course I learned a lot again. So… just so you get an idea what kind of research I did..: Here you find an excel sheet where I entered the sprockets for different models; including some that I already know, so that I’d have an idea of what would work for me. As you can see I had even considered to ditch the 12T sprocket and start at 13T. But I concluded that with 46T(front)-13T(back) as the highest gear I would have gone a bit too far in shaving off the high end of my gear range.
comparing sprocket combinations and designing my own custom cassette…
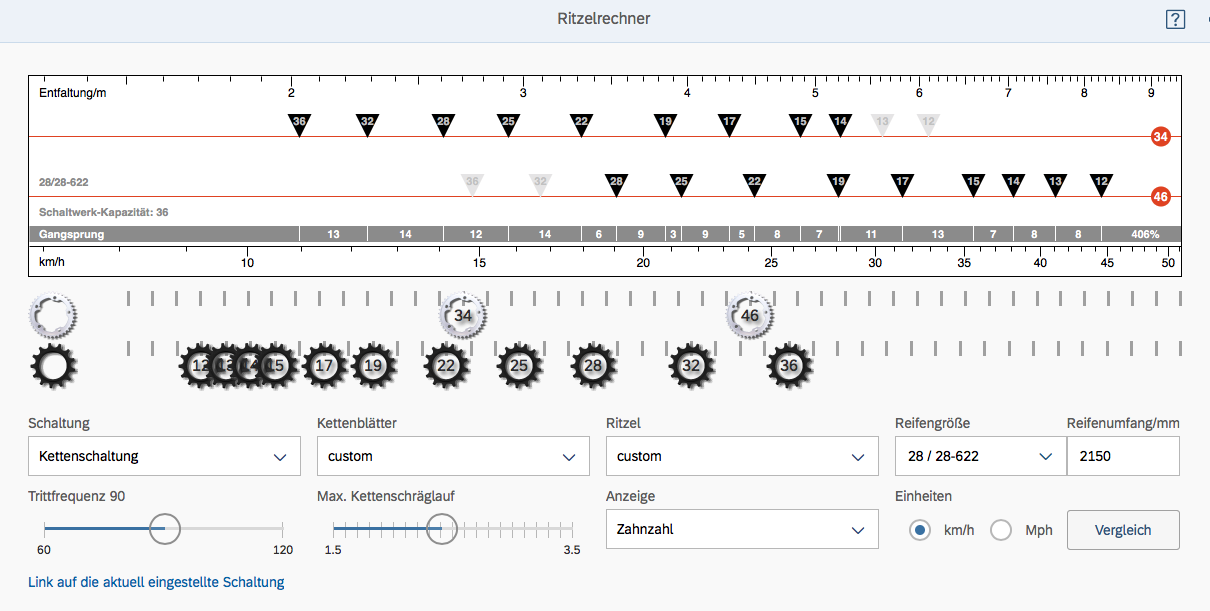
On the right you see links to a great gear calculator. I used it to check for each original cassette how big the jumps between gears are. That way – based on the cassettes I knew already – I had an estimate of how large of a gap to tolerate and where. Then i entered the details of my Frankenstein-cassette into the same calculator to see if it made sense:
So, the largest gap was now 13% (between 15-17). (Much more convincing is the argument that one of my past cassettes had the exact same sprocket configuration from 12 upward and it worked perfectly for me; that’s what I meant with the “simpler rational argument”). But more important than numbers is the feel: To get used to the gearing I put on that cassette already in May despite almost only riding in the flatlands around Berlin. And it feels really natural. I’m not missing any gear ratio at all.
A word on the chainrings: At the front I run on 46T/34T. A rather unusual combination I’d say. The 46 is already very small and thus means I have less high gears than what would be standard (50T). Now with the 12T instead of 11T as the smalles sprocket in the back I limit my higher end of the gear range even more. THAT’s how much I love grinding on low cadences. My reasoning: With the combination 46-12 I can still put pressure on the pedals at speeds around 50km/h (with a high cadence). But >=50km/h means down-hill. And down-hill means: Relax your legs! Recovery time! So there’s no sacrifice at all; and it grants me the filled gear gap. Furthermore: I very much like that the two front chainrings are so close in terms of teeth: I don’t have to do much compensatory cross shifting when changing between the rings, which encourages shifting more at the front. And there is high overlap between the two rings which means a more nuanced choice of gears.
This hole gearing episode really worked out. Let me add that in the course of it I was in touch with a fellow rider (René) who I only ‘knew’ from the TCR facebook group. He has a similar view on gearing and had the same plans (build a custom cassette), so we teamed up to import the parts from a vendor in the Netherlands.
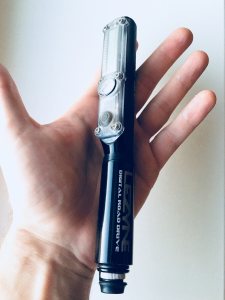
Air pump with pressure gauge
Last year close to Barcelona my shitty shitty Topeak Rocket (yes, it deserves to be name shamed!) hand pump model failed for a second time. I had bought a nice, very light air pump the day after. But this year I wanted one with a pressure gauge. Because: I switched to tubeless tires. But what made a much bigger difference for ride comfort: I lowered my air pressure by a LOT. Now riding 28mm with 4 to 5 bars. And I certainly don’t want to ride on too low pressure.
Originally my requirements for the pump were: a) the pressure gauge should be analogue so that I don’t have another electronic device to feed with batteries and b) it should mount to the valve directly and not via a soft hose; because I was still traumatized by the shitty shitty Topeak Rocket (rot in hell, you bad piece of gear! (sry, I just got a bit emotional)).
Well… I got some good advice in ‘my’ bike shop in Berlin (Pedalum Mobile), where I had btw. also bought the Specialized seat pack: According to that one employee, a tube outlet of the pump would actually be much better because there’s no strain on the valve while pumping. And a digital gauge is more precise and less prone to failure. Not sure about the latter, but about the valve strain: I tried one of my pumps that attaches directly to the valve and indeed it rocks the valve quite a bit. And because I’m tubeless (well, my tires are), I don’t want that at all: The movement could potentially break the fragile seal between rim and valve. So, in that shop I got this beautifulLezyne Digital Road Drive pump – with all that I originally didn’t want: a) a digital gauge and b) a tube outlet. The power of good arguments…
“Bike-fitting”
In January I got a new seat post (because of the seat pack clamp; see above). But I failed to note down any measurements of my working setup; so I ruined my position. I had to try a lot of things to make it work again. In the course of it I did quite some research on bike fitting methods, rules of thumbs, etc. and came up with a very rudimentary method about what steps to follow in what order (if you like I can send it to you; for now only in German). In any case, I was amazed to see what huge difference even small adjustments made. E.g. changing the saddle tilt by some invisible amount: no sore butt anymore. Finding the proper cleat-position = super relaxed feet and knee. Saddle hight 4mm too low = knee pain.
In the end I found a very good position – and I wrote it down!
New shoes: Shimano S-Phyre (road)
I was not happy with my Sidi-shoes anymore… Too heavy, too narrow for my feet, not enough ventilation. So I did a lot of research and – to my surprise – Shimano had the best solution for me: S-Phyre in the road-version (for road cleats). As it always goes, once you start researching, you discover all kinds of needs that you weren’t aware of; that’s why I ended up with this high-end product of the market. But really, I couldn’t wish for more:
They fit my feet perfectly like a sock, and the adjustable sole makes it even better (with pieces for either a high and a low arch).
The cut is not as narrow as with most Italian manufacturers (Fizik, Sidi, etc.)
plenty of air ventilation
Very light
Very stiff sole
smooth surfaces inside, even distribution of pressure and pull over the back of the foot and a very “grippy” heel.
Boa closing-system: allows really easy adjustments of tightness. I need that because my feet expand a bit during the day.
I had enough time (several months) to get used to them.
New glasses
I need prescription glasses; that doesn’t make it easier to find a good pair. Last year I travelled with three glasses to cover my as you’ll see high demands. This year I wanted to do it all in one pair of glasses. I had the following requirements:
they should be “friendly looking” (usually means: rather round shape). Seriously, road cyclists like us look already dehumanized enough… more like android robots. And we don’t tend to look friendly. But I want to be recognized as a sentient human being; not at last to attract drivers’ sympathy to not run me over, but also by the shop owner to fill my waterbottles or the border guard to let me pass quickly. I’m more serious than I’m joking with this! Also, I want to wear them in social contexts in the evenings of my tours (does not apply so much to TCR)
should be curved enough around my forehead to offer wind protection
but should be straight enough to still work with normal prescription glasses
need to be light and comfortably padded on the nose
I’ll need to fit UV-sensitive photocromic (self-colouring) lenses so they adapt to all lighting conditions
the shade of glass colour should be a neutral grey (don’t want to distort my colour experience)
You won’t believe it… I found those glasses! I did a lot of searching and stumbled over a new collection by Adidas. I ordered two models, “Adidas proshift” seemed perfect. I sent them in to an online optician to fit custom prescription lenses. Now it’s really perfect. They are super light, have comfortable nose pads, look friendly (I think), are quite curved but still accommodate glasses with the cheaper fitting-method (higher curve would have meant 350€ for lenses; now I paid 150€). The UV-adaptation works like a charm.
Took me a couple of days to get used to them because the curved angle of the glasses distorts the view at the edges quite a bit (that’s the effect they need to compensate with even more curved glasses, hence their higher cost).
I even like them so much that they became my primary every-day glasses.
Clothing
I needed some proper clothes to keep my packing list at bay and also have high quality gear to make everything as comfortable as possible.
Suomy Gun Wind helmet
New helmet:Suomy Gun Wind. A light helm makes such a difference!
Arm- and leg warmers: I tried (and then sold) several models. Ended up with Mavic Ksyrium, merino warmers
Over-shoes: The age-old problem. I wanted some that are light, do not keep me warm, waterproof, easy to put on. Ended up with GripGrap RaceAqua, in combination with some foam/rubber-seals for the transition to the leg (“CyclinGaiter”). Surprisingly, I really like dry feet. Not sure how long they would actually last in proper rain; I had no chance to try them, but it’s good to know I tried my best.
Isolation vest: I needed one a) to keep me warm while riding at night and at high altitude and b) to keep me warm while I sleep outside. I tried several models. And it was really not easy to find one that can really be packed small. I ended up paying quite some money for the Endura Primaloft SL vest in black. Ordering it was quite a hassle. But it felt really good the few times I tried it!
Long sleeve jersey: Ended up with a simple merino jersey by dhb. I liked that purple!
Long gloves: To wear over my cycling gloves. Same requirements as the overshoes: water proof but not warming. I went for a pair of Gore M Windstopper gloves. Sadly lost one somewhere in Bavaria at night. So had to order again (and a size larger). I submerged my hand in water as a test: absolutely water tight. And the inside texture feels fine, too, also with naked fingers; I’ll wear them over my regular short gloves in the rain or cold.
That way I had clothes that I could mix in many ways to cover a wide range of conditions.
That’s it for preparation… as you can imagine I learned a LOT in the process – that is very rewarding even by itself. I’m so much looking forward to seeing how all of that will turn out on the road…
I really wonder how many readers arrived at this sentence and have read it all. I’d guess 5%. So I see this rather as an account for myself; like a diary.
In the next (last pre-TCR-) post will briefly(!) address how I’ll approach the race, what will motivate or scare me: 03 TCR No6 – Hopes, Motivation & Fears (3 lists)
this coming Sunday at 10pm my craziest cycling adventure yet will beginn. Together with 280 other maniacs I will participate in the notorious ultra-endurance race across Europe:
I will participate in the 6th edition of the by now infamous Transcontinental Race across Europe (info below)
For now just some little facts and figures. I will release another post about what I’m planning to do here. But be sure that I approach this with a lot of humility…
To follow me, check…
#TCRNo6cap36 is my personal hashtag all over social media
General discussion and post about the race in the TCR Facebook group and tagged as #TCRNo6
About the race:
Start:Sunday the 29th of July at 22h in the evening in Belgium Finish: ca. 2 weeks later in Greece
It is a self-supported race, so there is no outside-assistance or cooperation allowed. (see the beginning of my TCR-post 02 for a more detailed explanation)
We riders will have to pass 4 Controlpoints that are spread all over Central and Eastern Europe. We had to plan our routes individually
ca. 280 riders
ca. 4000km and about 40.000m climbing | each rider has planned their own route
The clock never stops, so it is up to each rider when/if/where to sleep, where and what to eat | There are no scheduled breaks and no race-service
the fastest riders will do this in under 10 days! (not me!)
 GPS-track:


 My hopes & goals…
 What motivates me…
 What I fear…
 All that’s left to say…
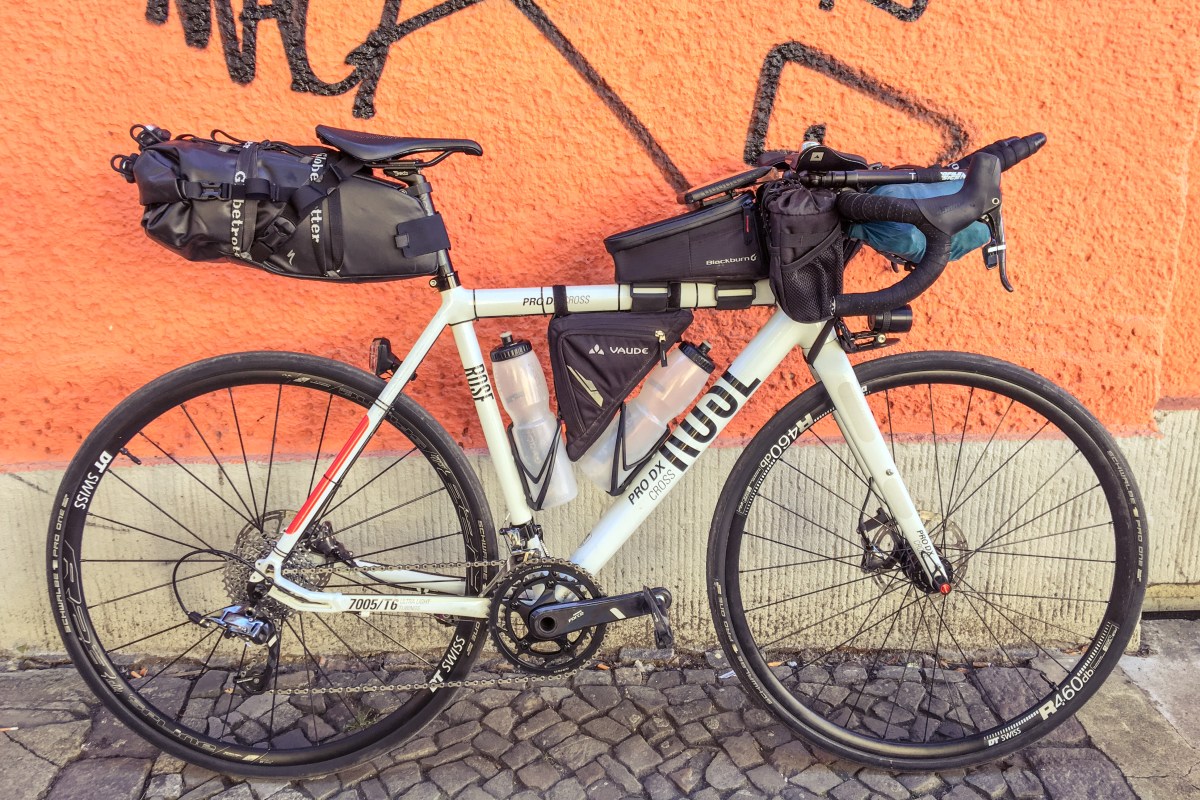
 Well… I got some good advice in ‘my’ bike shop in Berlin (
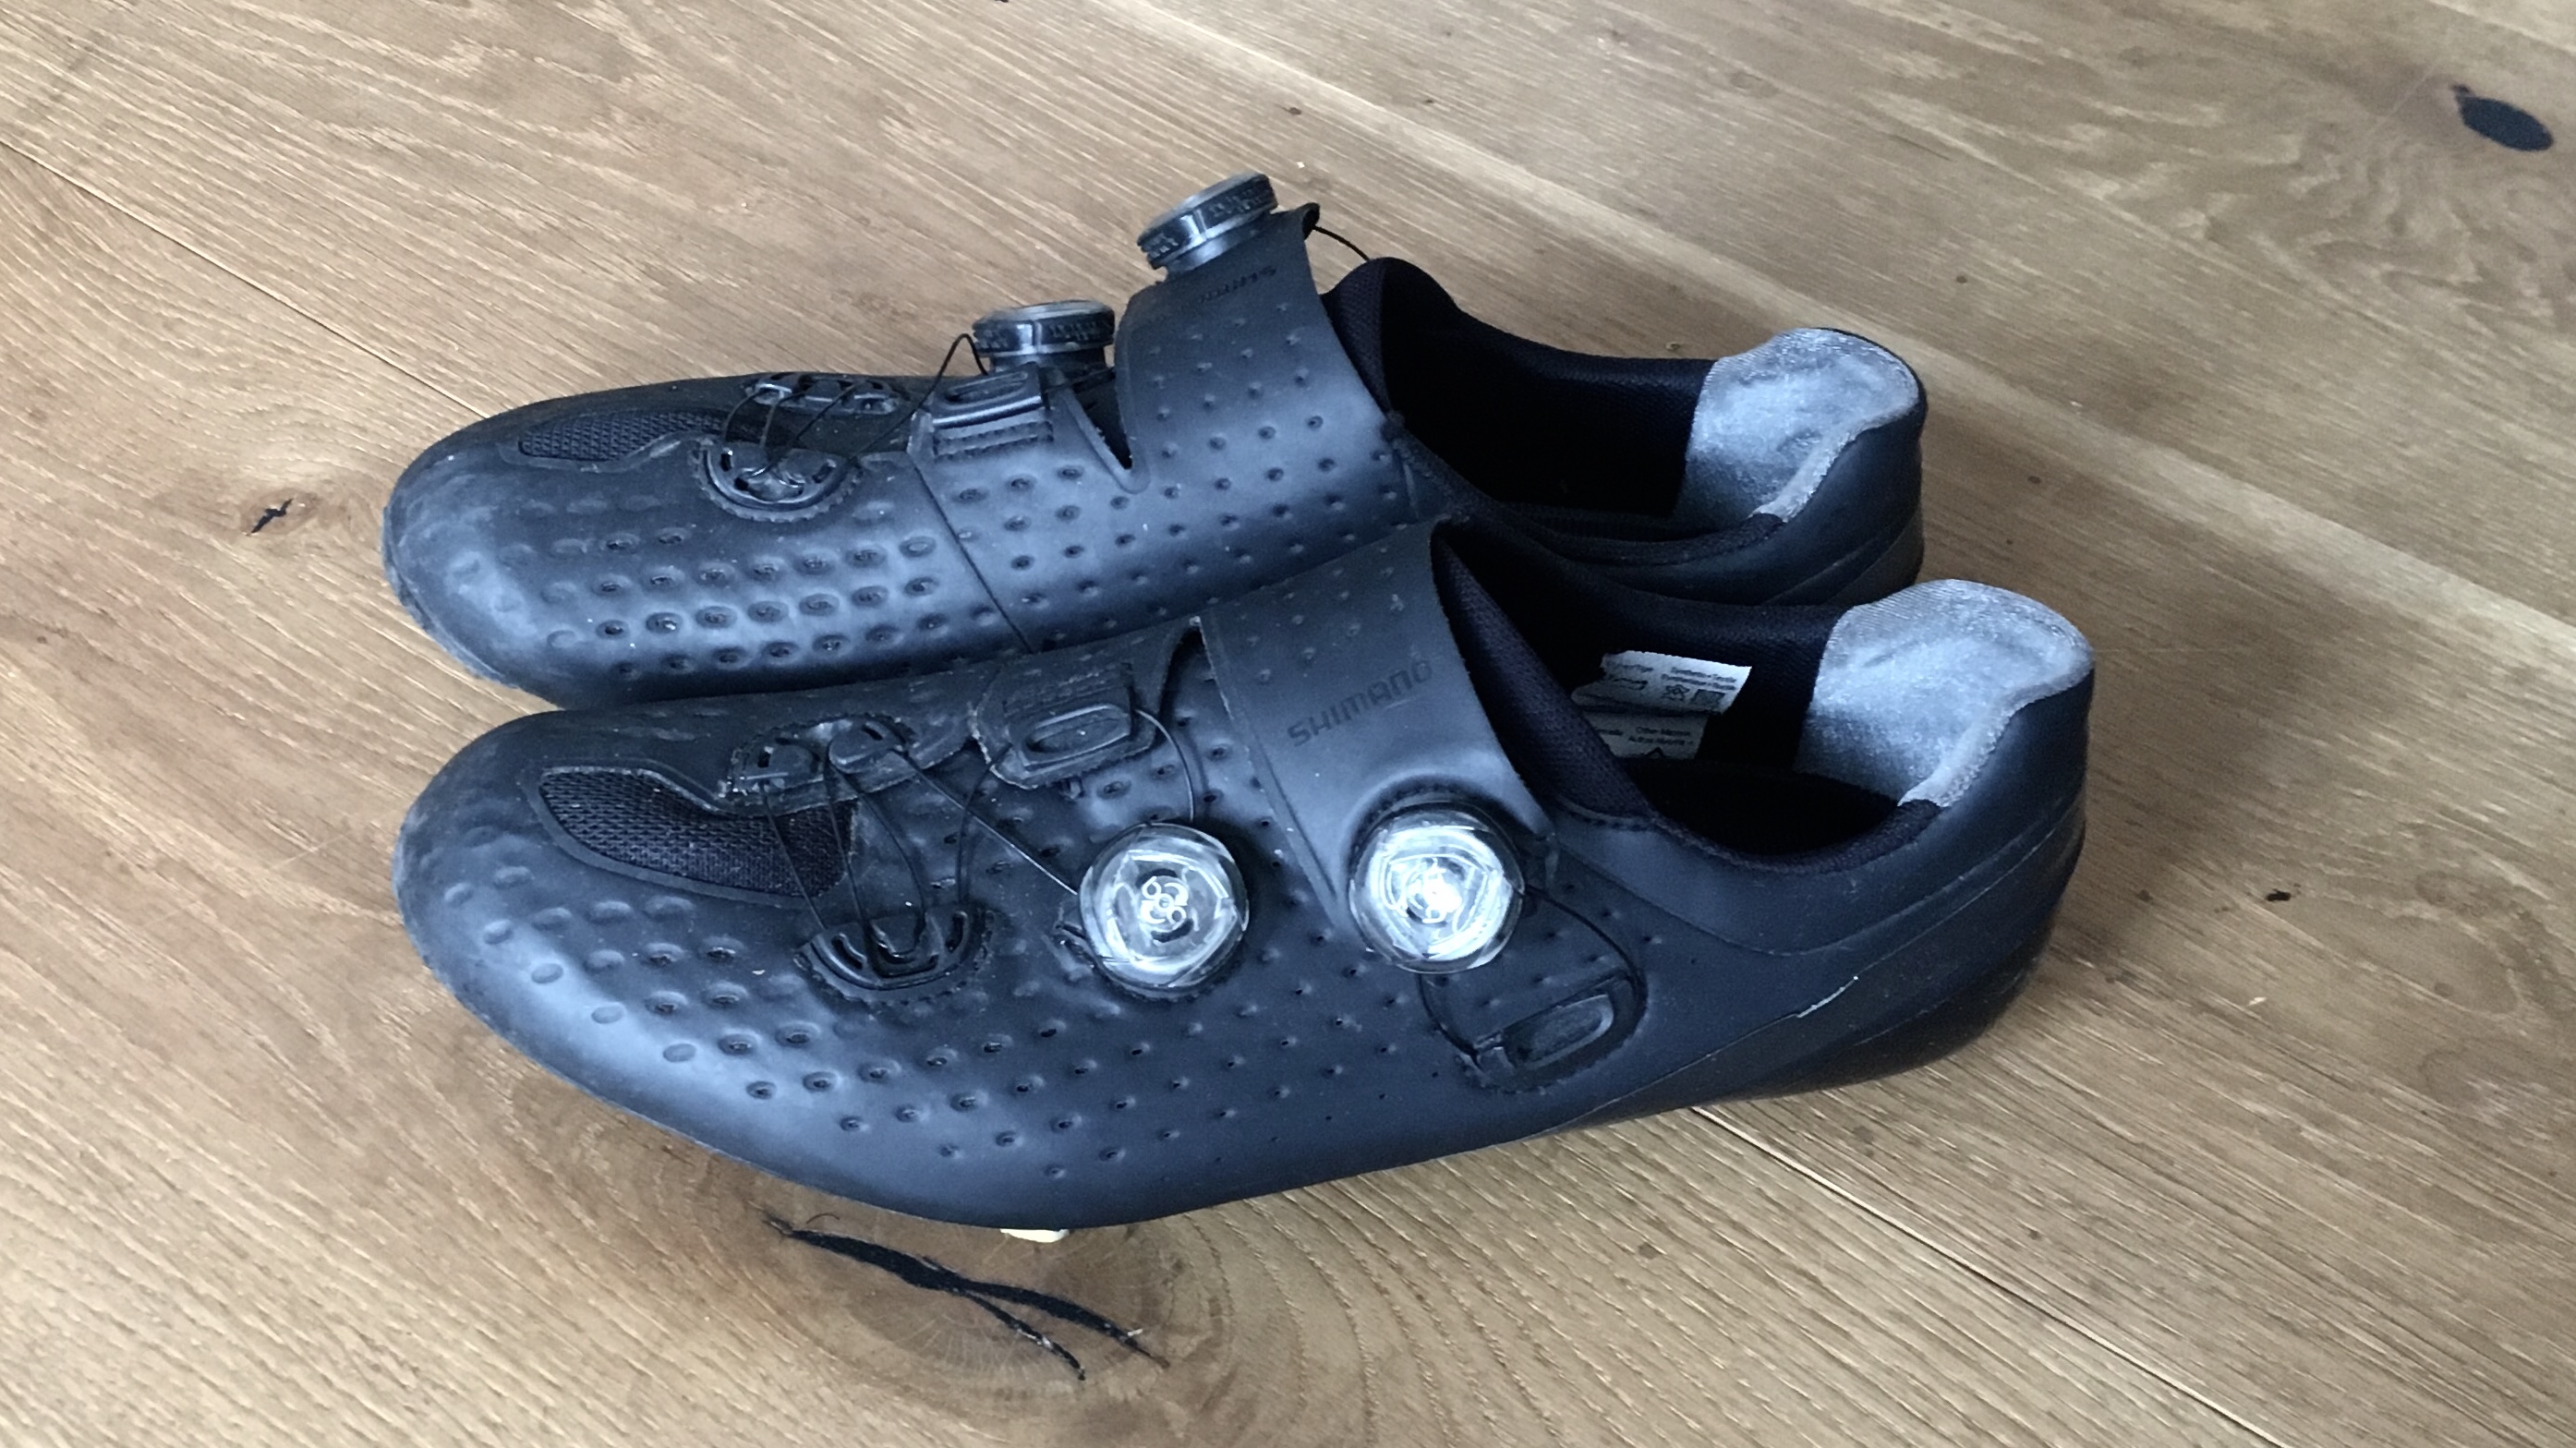 I was not happy with my Sidi-shoes anymore… Too heavy, too narrow for my feet, not enough ventilation. So I did a lot of research and – to my surprise – Shimano had the best solution for me: S-Phyre in the road-version (for road cleats). As it always goes, once you start researching, you discover all kinds of needs that you weren’t aware of; that’s why I ended up with this high-end product of the market. But really, I couldn’t wish for more:
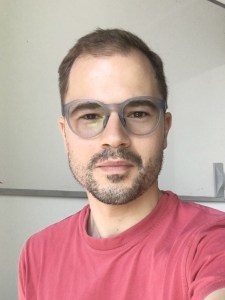 You won’t believe it… I found those glasses! I did a lot of searching and stumbled over a new collection by Adidas. I ordered two models, “Adidas proshift” seemed perfect. I sent them in to an online optician to fit custom prescription lenses. Now it’s really perfect. They are super light, have comfortable nose pads, look friendly (I think), are quite curved but still accommodate glasses with the cheaper fitting-method (higher curve would have meant 350€ for lenses; now I paid 150€). The UV-adaptation works like a charm.